FREE standard UK shipping for orders over £50
Your pets are part of the family, but their claws can leave unsightly scratches on your favourite leather furniture. Whether it’s your sofa, armchair, dining chairs, ottoman, bed frame, or even leather bar stools, our small Pet Scratch Leather Dye Repair Kit (LRCK16) is the ultimate solution for repairing pet damage and bringing your leather back to life. Designed for all types of top-coated, semi-aniline, vintage, faux, and vegan leathers, as well as vinyl, this easy-to-use repair kit restores scratches, scuffs, and small tears, ensuring a professional, long-lasting finish.
✔ Perfect for Home Furniture: Restore leather sofas, dining chairs, armchairs, ottomans, recliners, headboards, and more.
✔ Easy DIY Application: No need for expensive repairs—our kit includes everything you need to fix scratches and scuffs yourself.
✔ Self-Sealing & Flexible: Our water-based, solvent-free leather repair dye blends seamlessly, ensuring a durable and soft-touch finish.
✔ Safe for Your Home & Pets: Non-hazardous, non-flammable, and eco-friendly—safe to use around your family and pets.
✔ Works on All Leather & Vinyl: Compatible with pigmented, corrected grain, semi-aniline, two-tone, antique-finish, faux, and vegan leathers.
✔ Ultimate Protection: Our clear coat finish adds an extra layer of scratch resistance to prevent future damage.
Adding product to your cart

✔ Leather Sofas & Couches
✔ Dining Chairs & Benches
✔ Leather Armchairs & Recliners
✔ Leather Headboards & Bed Frames
✔ Ottomans & Footstools
✔ Car Seats & Interiors
✔ Leather Handbags & Purses
✔ Leather Office Chairs & Executive Chairs
✔ Bar Stools & Counter Stools
✔ Leather Shoes, Boots, & Jackets
🔹 Compatible Leather Types:
Pigmented Leather | Corrected Grain | Semi-Aniline | Two-Tone | Antique | Top-Coated | Vegan Leather | Bi-Cast | Bonded Leather | Faux Leather | Vinyl | Nappa Leather
👉Note:Always perform a patch test before use on your leather items.
Proper preparation ensures the best results. Use the alcohol cleaner and cloth to remove dirt and some surface colour, prepping the area for repair.
Unlike common advice, never trim loose fibres from pet scratches. Instead, gently lift them using the spatula and apply leather glue to secure them back into place. This method prevents holes and ensures a stronger, more natural repair.
Once the glue has dried (approx. 20 minutes), lightly sand the area using 320 or 1200 grit sandpaper to create a smooth, even surface.
For deeper gouges, apply Heavy Filler to rebuild the surface, ensuring it penetrates any cracks or damaged areas. Allow to dry, then sand gently for a perfectly smooth base.
Now the magic happens! Apply the self-sealing leather repair paint using a circular motion for the first coat, ensuring deep penetration for optimal adhesion. Then, sponge on additional layers for a professional-grade finish. Dry each layer with a hairdryer before adding the next.
Lock in the colour and protect your repair with two or three coats of our premium clear coat sealer. Choose from matte, semi-matte, satin, or gloss finishes for a flawless look.
See our leather guides for further help. Click Here
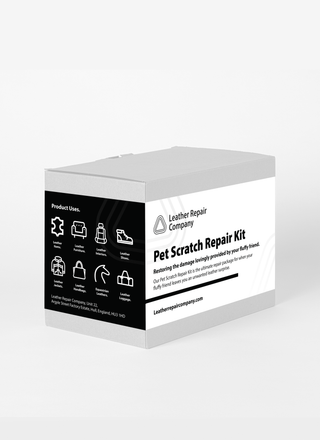
This comprehensive pet scratch repair kit contains everything you need to restore and protect your leather furniture, car interiors, and accessories:
🔹 Self-Sealing Leather Repair Paint – Flexible, scratch-resistant, and long-lasting
🔹 Leather Glue – Bonds loose fibres for a stronger repair
🔹 Heavy Filler – Perfect for deeper scratches and gouges
🔹 Alcohol Cleaner & Cloth – Prepares leather for optimal adhesion
🔹 Spatula & Sandpaper – Ensures a smooth, flawless finish
🔹 Clear Coat Finish – Choose from Matte, Semi-Matte, Satin, or Gloss
Sign up for offers plus hints and tips on how to keep your leather goods looking their best for longer.
By completing this form, you are signing up to receive our emails and can unsubscribe at any time.

