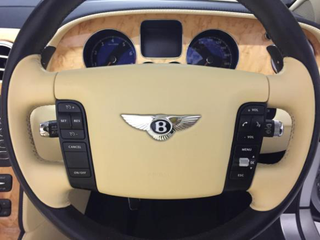
How To Restore A Leather Steering Wheel


Leather steering wheels go wrong often, this is due to grease and sweat from your hands resting on the wheels constantly, along with the friction of the steering wheel sliding around in your hand.
Colour loss is very common along wit ring marks and scratches.
Leather steering wheels are very costly items and can cost many thousands to replace when they have gone wrong, so why spend all that money on a replacement when a refurbishment can be carried out quickly, easily and put the wheel back to OEM conditions.
This guide will show you how to make your leather steering wheel look as good as new again with a leather steering wheel repair kit from the Leather Repair Company. The kit from LRC has more products in it than any other competitor on the market and is far cheaper than others.
This video will help guide you through a steering wheel restoration process.

Step 1 – Cleaning the steering wheel
The first step is to deep clean the steering wheel with the leather cleaner that’s I your steering wheel repair kit, this is done with the leather cleaner LRC1, apply to the wheel and work in with a soft brush or bamboo fibre cleaning pad. As you begin to lift the dirty and grime away you will probably notice colour loss that the grease and dirt have been hiding for some time. Then dry with a bamboo fibre drying towel to remove the dirt and grime from the surface.
Step 2 – Preparing the steering wheel
The preparation stage is the most important part of the steering wheel restoration process. Within the steering wheel repair kit is the leather prep and alcohol cleaner, along with a scotch pad, Apply the leather prep solution to the scotch pad and gently rub over the steering wheel, don’t scrub too had as leather on a steering wheel is only thin leather from a drop split hide. The purpose of this is to remove the colour on the surface as show in the image below, once you have removed the colour you can then use the alcohol cleaner to finish the degreasing process to remove sweat and grease build up. Allow to fully dry then you’re ready for the colouring stages, if you wheel is badly cracked or has a hole in it, at this stage you would apply fillers and sand then smooth again before colouring.


Steering wheels that have cracked leather like this can have filler applied, its best with heavy cracking to use the heavy filler, fine cracking you can use the flexi filler. Once filler has been applied and left to dry you can sand this smooth so its not rough on the surface.
Step 3 – Re colour your leather steering wheel
This is where the process makes your leather steering wheel look like brand new once again. You can either spray the leather colourant on or sponge this on to your steering wheel. If you are applying by sponge you can simply apply the first coat by wiping this on to the leather steering wheel, allow to dry or dry with a hairdryer and then stipple on another couple of coats, drying between each coating you apply. If spraying spray as is with an airbrush or 0.5 needle spray gun following the video above. Once you have applied enough paint lightly sand to remove any imperfections and apply a final coating.


Step 4 – Applying the sealer lacquer to your steering wheel
This is the step where you lock everything in that you have just carried out to your leather steering wheel. The clear coat sealer is a very thin product in your kit it comes with gloss and matt mixing these two together gains a satin, if you want it lower sheen than a stain, then add more matt to the mix. The matt on its own is far too flat and dull. Wipe on the first coating dry with a hairdryer and then light sand over with 1200 grit sand paper, then apply two more coats with stippling action as I the video and sand again drying between coatings. The final coat is applied and then polished with 2500 grit paper. If you are spraying this on follow the steps in the video, apply first coat sand, then apply more coats drying between coating and sanding with the 1200 grit sand paper, finally polish with the 2500 paper to finish off your leather steering wheel restoration.


